My boys have feisty opinions about what they wear and when they're not butt naked, they're wearing their favourite trousers and t-shirts. So, over the last few years, when they've grown out of their absolute favourites, I have been up-cycling the pictures on them onto new, plain tees. Sure, I could go out and get him a new Batman tee, but this way is much cheaper and they're made just for them. Sometimes, family members buy them designer clothes and worse than watching them chuck chocolate ice cream down a beautifully made tee is watching them grow a little tight around the edges, which is how this all started in the first place. I could never face getting rid of them and the boys loved them so much. Our favourite designer tees were all applique anyway so I was inspired to re-applique them onto new, bigger tees.
So, obviously, to get started you need a grown out of tee, an iron, some bondaweb and a sewing machine or a needle & thread.
You can go as crazy as you like with this too, there are no limits, except your imagination.
I once cut out all the images on a pair of Buzz Lightyear trousers and lovingly hand-stitched them onto a Summer hat.
Here we go;
1. Lay out your tee.
2. Cut out the image you want to keep. Chuck the rest. You want to cut it out quite roughly, there's no need to be pedantic. You'll need plenty of around the edges.
3. Lay out your image(s) on the bondaweb. Trim it as close as you can, you do not want that stuff sticking to your ironing board or your iron. You can use some of your rough edges to ensure a close trim.
4. Flatten everything nicely and iron until the bondaweb has stuck. Most kids t-shirt images can't be ironed on, so just do it from the back, but don't forget to check it's flat on the other side, jersey (t-shirt fabric) can have a mind of it's own.
5. Now trim the edges nicely. You can be as pedantic as you like, or you can make your sewing much easier by just doing a very basic shape or by rounding everything off. I tend to leave a small edge around the image so I don't have to sew on the actual image.
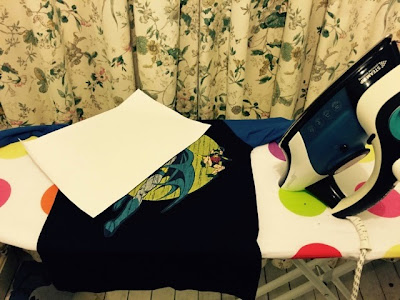
6. Lay out the new t-shirt and place the image where you want it.
Because you often can't iron directly on t-shirt images, I use a piece of A4 paper because I find it gives me more control than using a tea towel or something and the heat transfers well. You could also use baking parchment or greaseproof paper.
7. You're ready to sew.
I made a few since I'd bought a triple pack of long-sleeve tees for about £7 from Asda.
You can hand stitch it (bearing in mind a CHILD will be wearing it and we all know what they do with their clothes) or use a sewing machine.
I use a free motion embroidery foot because I want to practise with it more, so no, my stitching isn't perfect but the boys won't be complaining and it's not about perfect stitching. This is a free-for-all, go for it!
If you manage to follow my dodgy instructions, I'd love to see what you make, please show off your handiwork in the comments below.
Good luck and a Happy New Year to you all xxx


No comments:
Post a Comment