Showing posts with label diy. Show all posts

Monday, October 10, 2016

Monday Make: How To Make Little Notebooks

Monday Make: This week's project


You will need:
paper (enough to make as many pages as you want)
PVA glue
an old paintbrush (for applying glue)
a really sharp rotary blade
needle and thread
awl tool (hole making pokey stick)
scissors
cutting board
metal ruler
cardboard
some pegs
fabric of choice
and a guillotine is useful.
Cut your paper to twice the size you'd like your notebook to be (with a little extra if you want to be picky about the size as we'll be trimming the edges later).

Fold all the pages, making sure you've got nice sharp edges.
Place them like above, with no more than about six pages together so it's not too bulky.

Poke holes along where the spine will be using the awl. You can do it without an awl but it may hurt your fingers. 
I found two at the top around 1cm apart and two at the bottom is great.

Sew all the pages together. I found this (pictured above) to be the best way of keeping the sections together.

Tighten it all up and knot the ends.

Coat a strip of your fabric in PVA and stick it along the spine of your pages. Fasten with some pegs and leave it to thoroughly dry.

Once dry, trim the top, bottom and side edges neatly using your ruler, rotary blade and cutting board.

Measure the book now the edges are trimmed and cut the cardboard the same size, including a strip for the spine.

Glue the cardboard to the underside of your fabric.


Fold all the fabric edges in neatly, gluing all the time to ensure it's all covered, including the cardboard.

Pop your pages in so that the outside pages glue to the inside of the cover. Fasten with pegs and leave to dry.

This method is not perfect and after a few attempts I have found the following issues; the pegs leave marks on the outside of the cover, which apparently do not iron out, the spines still feel  little loose (I wonder if using paper rather than fabric might cure this?) and the cardboard I used warped like hell. Probably should have used thicker cardboard or left them to dry under something heavy and non-stick.

Anyone have any suggestions?
If you like what you see, share it using one of the magic buttons below. 
Leave a comment or even subscribe, it would make my day :)

Tuesday, March 3, 2015

Cereal Box Marble Run: How to

I recently spotted this on Pinterest & had to try it with my marble loving boys.
We spent what felt like weeks collecting toilet rolls & cereal boxes, then finally we had enough to make two.


 It has a trap door at the bottom, so the marbles don't come tumbling straight out & a hole in the top.


Then, when we came to make Ed's, as impressed as he was with Bean's, he wanted a marble maze instead. 
So I asked him to draw a track on the cardboard, which then had to be slightly amended on the parts where it was too close together and we added extra routes where there were gaps.
I tried to make it using the loo rolls, but there wasn't enough, so I had to make amends with the spare cereal box, which turned out much better and far easier to put together.
Oh, I cant tell you how much I enjoyed making this!
This one also lasted a lot longer than the loo roll one.

 It has a hole at one end, then a trap door in the other so if he fills it, he only has to control one hole. 
As soon as I made it, he put all the marbles in haha.


 Sooooo much fun! Go make one!

Wednesday, January 21, 2015

Up-cycling: Rescuing an Old Basket from the Bin

This helped me solve a problem I had on my bedside table. I've been redecorating my bedroom and it's coming along beautifully except the random items I desperately need at my bedside were driving me mad. I needed a basket of some kind but my searching had come up with nothing that would fit in my scheme of things. I knew I'd end up making something myself so when I found this broken old basket in the bin (not my bin, but don't tell) I was pleased as punch. 
I could see why it was being thrown out, the top edges had completely come apart with sharp sticks poking out everywhere, but with a fabric lining, no one would ever know what lies beneath. 
You could do it too! 
Paint it the colour of your choice and find some fabric you like. I could have made it to fit perfectly, but I hate sewing curves so I just gathered the excess in and put some elastic around the top edge. 

Up-cycling; it's fun, saves waste AND it can solve your storage problems :)

Tuesday, January 13, 2015

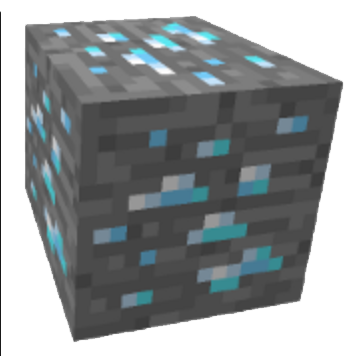
Minecraft Diamond Ore Curtains

So I needed to make some curtains to go in the boys new Minecraft room. At first I was completely stumped, but after raiding my fabric stash I came up with these.
I love that I have so much fabric, and so many different kinds. I'm so grateful to all the people who let me raid their clear-outs.
I had some grey wool, but unfortunately not enough, so I backed it with some black wool, which actually turned out great because it's given them a really useful blackout effect (fab for playing games with torches). If I was to make them again and willing to buy fabric especially, I would simply use a nice grey cotton or something.
For the blocks, I used some shiny satin and metallic polyester.

I cut out my curtains and started on the coloured blocks. Because I was using scraps from my stash, I used several pieces. I first ironed on some bondaweb.
 Then I drew on some 3x3cm squares using my set square.
 These are the shapes I wanted to cut out.
 I cut them all out and pinned them in place, using a google image as a guide.
I ironed it and stitched it all together.

Et voila!

The wool is very wiggly and it would've looked better in cotton, but it was free so I'm not complaining and the boys are very impressed.

Think I'll make some matching cushions...

Monday, January 12, 2015

Minecraft Boys Room

So yes, I have two children and yes, they are addicted to Minecraft. Like the nation of children (and a few grown ups).
So, when I offered to re-decorate their room after a move-around (it needed re-painting anyway due to the sheer amount of 'art' on the walls and after moving the furniture it's blindingly obvious where it all used to be), they asked if they could have a Minecraft room. To be fair to them, they currently have nursery curtains (in a very cute zoo animals print), so maybe it is time for a change.
I didn't really want to go with a 'theme', but I know how often I like to change things around so by the time they're bored of it, I'll be very pleased to do whatever needs to be done.
I've pretty much made this up as I went along and I've done it on the cheap with what I could find around the house.

Their room is chocolate milk colour, I last decorated it in February 2012. This is how it was until they grew out of their toddler beds and went into bunk beds.
Ed and Bean's first night in their new bunk beds instagram photo

Unfortunately, no-one wanted to be on the top bunk. Ed got it by default because Bean was too young (and incredibly clumsy) but he's never been particularly happy about it. We had discussed Bean going up there when he hit five and a half over the Christmas period, but when the time came, he wasn't confident enough. So, after measuring everything up, making a layout plan, I worked out I could (just about) get it all to fit with the beds separated. No more top bunk.
Tiny room, bit of a squeeze.
So that's that solved.
Now to work out how the hell I'm going to make a 'Minecraft room'. I googled it and all I came up with was those sticky decals which would last a whole five minutes with my monsters. Mojang aren't making any bedding or anything at the moment so it's just up to the creative types to solve this.
I decided I would go for a simple motif, touch up the chocolate milkshake on the bottom half and paint the top half green. Then I planned to add some Minecraft block detail with a handmade stamp. However, my darling Mr Strawberry commented on how green it would be and wouldn't it be nicer with a blue sky too? Of course he was right, so off to B&Q for more paint I went.
I tried to make a stamp using a piece of wood and some glued to felt, but it didn't hold the paint enough to provide a good stamp, so I ended up making a stencil (oh how I hate working with stencils) but it worked out well after a bit of touching up.

Grass block.
Making the stencil;
Using a grass block as inspiration, I drew out 3x3cm squares on a piece of card, to make a stencil. Then laminated it, and cut out the appropriate squares to make this...


I drew a line around their room using Mr Strawberry's spirit level.
I painted the top half a beautiful sky blue, touched up the brown where it needed it, then painted a green stripe across the middle.
Using my stencil, I added the grass block effect, then painted Minecraft clouds along the top edges. I did them free hand so they're not perfect and would've been better if I'd used my set square, but I'm happy regardless. Remembering which pot had the darker grey proved to be the biggest issue while doing this.
Sky inspiration.
And here's the finished room...


Grass block detail. 
'Snow block' storage from Dunhelm.
I'll tell you all about the curtains in a post coming soon....

Tuesday, September 18, 2012

365 Photo. Day 11


My husband, who has a nasty habit of bringing home junk and cluttering up our very cluttered house and consequently driving my up the frickin wall, brought these home last night.
Normally I would hit the roof (he loves to build bikes and therefore has a few of them already loitering in my garden/loft/anyway he can find space), but these babies have made me a very happy bunny. I’ve been jealous of Ed’s scooter for a while and wanted an adult size one, and I looooove the ladies town bike, I was looking on eBay a while ago, but I couldn’t justify the spend so I gave up. He found both of these in a skip, and yes, they both need a lot of work, but it’s nothing he’s not capable of. And I know it's really hypocritical of me to not be cross this time, I'm so very selfish sometimes. In my defence, my husband is a very busy man, and building bikes is not something he actually has anywhere or any time to do.
I am very excited, they are going to be beautiful and coooool as. I’m so looking forward to when Bean can ride his bike a bit faster and we can all go to school on wheels.

I was riding round the house on the scooter last night and it’s amazing!  Argh! I can't wait!
And yes, today's photobomb was brought to you by Milly.