Wednesday, June 29, 2016

Wreck it Wednesday: Infuse This Page with a Smell of Your Choosing

Wreck it Wednesday: a page from one of my journals.

Rose scented hand cream....mmmmm

 
About 'Wreck This Journal' by Keri Smith
(Description from Amazon)
It is book for those who've always wanted to draw outside the lines but were afraid to do it. For anyone who's ever wished to, but had trouble starting, keeping, or finishing a journal or sketchbook comes Wreck This Journal, an illustrated book featuring a subversive collection of suggestions, asking readers to muster up their best mistake - and mess-making abilities to fill the pages of the book (and destroy them).
Through a series of creatively and quirkily illustrated prompts, acclaimed artist Keri Smith encourages journalers to engage in "destructive" acts - poking holes through pages, adding photos and defacing them, painting with coffee, colouring outside the lines, and more - in order to experience the true creative process. With Keri Smith's unique sensibility, readers are introduced to a new way of art and journal making, discovering novel ways to escape the fear of the blank page and fully engage in the creative process.
 

Tuesday, June 28, 2016

Tempting Tuesday: Chocolate Brigadeiros

Tempting Tuesday: trying not to kill my family with my experimental cooking.

I have discovered an amazing recipe website and I want to make everything on it. I thought I'd start with these, they looked yummy and easy to make (which they were, on both counts).
Ingredients:
30g butter
397g tin of condensed milk
40g cocoa powder
100ml cold water
chopped nuts

Directions:
In a heavy or non-stick pan, melt the butter then add condensed milk.
Bring to a slow boil.
Mix cocoa powder with the water until smooth.
Add this to the pan and stir through.
Bring to a medium boil and keep stirring so it doesn't catch or burn on the bottom.
The recipe says to boil for 15 minutes, but I must have had it on slightly too low, mostly because I was terrified of ruining it. Just keep stirring until its really thick and can hold it's own shape.
Put it into a shallow bowl and chill for 30 minutes in the fridge.
When chilled, mix it up with your hands, it should be like a heavy playdough.
Roll little balls in your hands and cover them with chopped nuts, chocolate sprinkles, coconut, what ever you fancy.
I found that when I went straight into making balls, those made using the outside of the mixture were less sticky than those made using the center of the dough and therefore the nuts wouldn't stick to the outside.

These are utterly yummy, though at first my children preferred them without the nuts on and made me painstakingly pick them off. They soon changed their mind thankfully but now they are all gone and I am sad. I'll have to make more...

These would make gorgeous Christmas presents too, in lovely little boxes.

Free printable recipe card. Just right click & save as.

If you like what you see, share it using one of the magic buttons below. 
Leave a comment or even subscribe, it would make my day :)

Monday, June 27, 2016

Monday Make: T-Shirt Quilt

Monday Make: This week's project


I am so pleased, I've finally finished this quilt. I've been collecting the t-shirts for at least eight years. I started preparing them together this time last year, just before I got pregnant, knowing I'd need a project that ensured I sat down and got some much needed rest at some point. I worked on it rather sporadically over the last twelve months and it's finally finished. The boys are thrilled with it, it holds some favourite t-shirts and they love hearing about when they were little. 
I used a fleece blanket I'd kept from when they were tiny and sliced it up to make the borders. On the reverse is one of the duvet covers they used when they first went into 'big boys' beds.


Saturday, June 25, 2016

Sticky Saturday: Ice Lollies

Sticky Saturday: messy play fun with kids


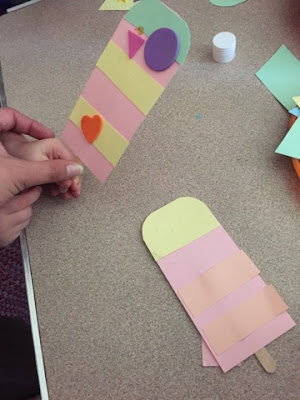
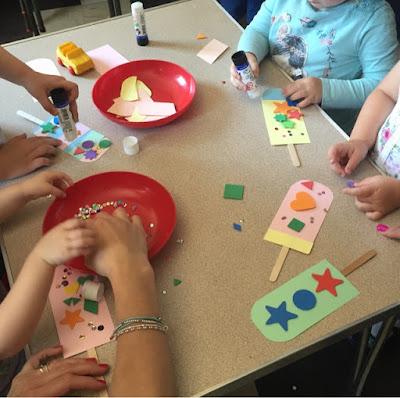
This week we made tasty looking ice lollies using pre-cut shapes, sequins and lolly sticks.


Wednesday, June 22, 2016

Wreck it Wednesday: Doodle Over The Top of This Page

Wreck it Wednesday: a page from one of my journals.


About 'Wreck This Journal' by Keri Smith
(Description from Amazon)
It is book for those who've always wanted to draw outside the lines but were afraid to do it. For anyone who's ever wished to, but had trouble starting, keeping, or finishing a journal or sketchbook comes Wreck This Journal, an illustrated book featuring a subversive collection of suggestions, asking readers to muster up their best mistake - and mess-making abilities to fill the pages of the book (and destroy them).
Through a series of creatively and quirkily illustrated prompts, acclaimed artist Keri Smith encourages journalers to engage in "destructive" acts - poking holes through pages, adding photos and defacing them, painting with coffee, colouring outside the lines, and more - in order to experience the true creative process. With Keri Smith's unique sensibility, readers are introduced to a new way of art and journal making, discovering novel ways to escape the fear of the blank page and fully engage in the creative process.

Tuesday, June 21, 2016

Tempting Tuesday: Baklava

Tempting Tuesday: trying not to kill my family with my experimental cooking.
What I thought was the ingredients:
350g caster sugar
the juice of one lemon
270g pack filo pastry sheets
175g butter, melted
175g mixed chopped nuts
3 tbsp. honey
As I write this, I now realise what went so horribly wrong with my attempt at this.
The recipe I had in my collection was impossible to follow due to a fatal flaw (it never mentioned what the hell I was supposed to do with the honey despite having it in the ingredients list) and meant that I had to Google other versions, but that has helped me understand it much better and it has pointed out to me where I went wrong. It turns out I not only used about half the amount of filo pastry sheets as I should have done, I mis-read the amount of nuts and only put in 175g of mixed nuts rather than 175g each of walnuts, almonds and pistachios and I thought I'd been too shy with the butter and poured the leftovers over the whole lot before putting it in the oven. That goes a long way to explaining why the hell my beautiful baklava was incredibly soggy and needed to be drained on a rack.
If you don't cock up the ingredients, it is really easy to make. And by golly, it's yummy.
Amended version so you make a sensible sized version and only have to buy one pack of filo pastry.
Ingredients:
175g sugar
juice of one lemon
270g pack filo pastry sheets
100g butter, melted
2 tbsp honey
200g mixed nuts, chopped finely
Preheat the oven to 180°C (160°C fan).
Heat sugar, honey and lemon juice in a pan with 175ml water, stirring until the sugar is dissolved. Simmer for about ten minutes until all syrupy. Remove from the heat and chill.
You can be super pedantic about cutting your pastry sheets so they fit perfectly in your pan, or you can just bung them in in a layer-like fashion. I tried to cut around my pan, but I soon realized it wouldn't matter either way, not really.
The pack I bought had 7 sheets in it. I cut it all into half, which gave me 14 squares. So, I layered it up as follows; 4 sheets - ⅓ of the nuts - 4 sheets - ⅓ of the nuts - 3 sheets - ⅓ of the nuts - 3 sheets.
Remember to save some nuts for the top, or just grab more. You can't have too many nuts.
Butter a baking tin.
Brush butter over each layer as you put it in.
Sprinkle the nuts over evenly so you have them spread out nicely over 3 layers.

When you're done, slice through the whole lot in whatever size/shape pieces you want. This is important. My crappy recipe told me to 'score' the top layer, which is laughable as I'm pretty certain that pastry, once cooked, is not going to be sliced up without entirely falling to pieces.
Bake in the oven for 1 hour.
When you take it out the oven, pour the honey syrup gently over the whole lot (the nut topping will get all discombobulated if you're too rough). It should sizzle excitedly.
Now comes the torturous wait. 4 looooooong hours, at least. Overnight is even better.


Free printable recipe card. Just right click & save as.

If you like what you see, share it using one of the magic buttons below. 
Leave a comment or even subscribe, it would make my day :)

Monday, June 20, 2016

Monday Make: Recipe Book

Monday Make: This week's project


Now that I'm finally working through my recipe scrapbook, I thought it time to revamp it. I loved it but it was a bit tired and well worn on the few pages I actually used on a regular basis (mostly vanilla sponge and pancakes).


I found an A5 ringbinder in my stationary stash and filled it with painstakingly printed out lined pages, with lovely rainbow lines and a cute border (put together in Microsoft Publisher). I also made some cute title pages and a front cover in Photoshop.
I found some leftover A4 dividers and cut them to size to separate the chapters and used my label maker (yay! love my label maker) to label them.


Just in case you need them;


Now I just need to finish writing out my recipes and I look forward to amending the ones that inspire me but I can't put in as they are because they contain ingredients I hate...

Saturday, June 18, 2016

Sticky Saturday: Father's Day Cards

Sticky Saturday: messy play fun with kids


So, with it being Father's Day this weekend, we obviously had to make cards.
I saw this idea on Pinterest and thought it'd be great for the kids.
I just cut out some big tie shapes, bought a shed load of little dot stickers and star stickers, a pack of stick on buttons from Baker Ross and I 'amended' the cards so we could fold down the collars. 

I love what you get from something so simple when you leave them to it. Check out Ed and Bean's below, they're epic.


Thursday, June 16, 2016

#tbt: Blackwork Streetscene

Throw back Thursday: taking a look at stuff I've made in the past.

I made this in 2012, inspired by the smallest picture in the world which I spotted in a book catalogue of all places. 
I pretty much made it up as I went along, drawing straight onto the canvas with a water-soluble pen. 
Mr Strawberry was all like, "aren't you going to finish it?" and I was like, I totally have. The little snippets of colour are entirely intentional.
It took me about 3 months and I loved doing it, which lets face it, is the whole point.
It hangs in our bedroom, just under last week's jellyfish painting.