Tuesday, January 13, 2015

Minecraft Diamond Ore Curtains

So I needed to make some curtains to go in the boys new Minecraft room. At first I was completely stumped, but after raiding my fabric stash I came up with these.
I love that I have so much fabric, and so many different kinds. I'm so grateful to all the people who let me raid their clear-outs.
I had some grey wool, but unfortunately not enough, so I backed it with some black wool, which actually turned out great because it's given them a really useful blackout effect (fab for playing games with torches). If I was to make them again and willing to buy fabric especially, I would simply use a nice grey cotton or something.
For the blocks, I used some shiny satin and metallic polyester.

I cut out my curtains and started on the coloured blocks. Because I was using scraps from my stash, I used several pieces. I first ironed on some bondaweb.
 Then I drew on some 3x3cm squares using my set square.
 These are the shapes I wanted to cut out.
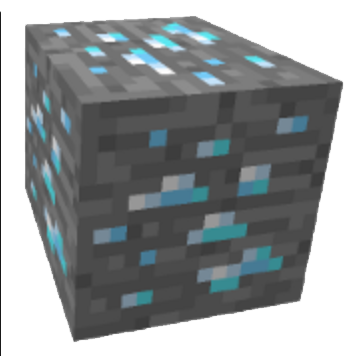
 I cut them all out and pinned them in place, using a google image as a guide.
I ironed it and stitched it all together.

Et voila!

The wool is very wiggly and it would've looked better in cotton, but it was free so I'm not complaining and the boys are very impressed.

Think I'll make some matching cushions...

Monday, January 12, 2015

Minecraft Boys Room

So yes, I have two children and yes, they are addicted to Minecraft. Like the nation of children (and a few grown ups).
So, when I offered to re-decorate their room after a move-around (it needed re-painting anyway due to the sheer amount of 'art' on the walls and after moving the furniture it's blindingly obvious where it all used to be), they asked if they could have a Minecraft room. To be fair to them, they currently have nursery curtains (in a very cute zoo animals print), so maybe it is time for a change.
I didn't really want to go with a 'theme', but I know how often I like to change things around so by the time they're bored of it, I'll be very pleased to do whatever needs to be done.
I've pretty much made this up as I went along and I've done it on the cheap with what I could find around the house.

Their room is chocolate milk colour, I last decorated it in February 2012. This is how it was until they grew out of their toddler beds and went into bunk beds.
Ed and Bean's first night in their new bunk beds instagram photo

Unfortunately, no-one wanted to be on the top bunk. Ed got it by default because Bean was too young (and incredibly clumsy) but he's never been particularly happy about it. We had discussed Bean going up there when he hit five and a half over the Christmas period, but when the time came, he wasn't confident enough. So, after measuring everything up, making a layout plan, I worked out I could (just about) get it all to fit with the beds separated. No more top bunk.
Tiny room, bit of a squeeze.
So that's that solved.
Now to work out how the hell I'm going to make a 'Minecraft room'. I googled it and all I came up with was those sticky decals which would last a whole five minutes with my monsters. Mojang aren't making any bedding or anything at the moment so it's just up to the creative types to solve this.
I decided I would go for a simple motif, touch up the chocolate milkshake on the bottom half and paint the top half green. Then I planned to add some Minecraft block detail with a handmade stamp. However, my darling Mr Strawberry commented on how green it would be and wouldn't it be nicer with a blue sky too? Of course he was right, so off to B&Q for more paint I went.
I tried to make a stamp using a piece of wood and some glued to felt, but it didn't hold the paint enough to provide a good stamp, so I ended up making a stencil (oh how I hate working with stencils) but it worked out well after a bit of touching up.

Grass block.
Making the stencil;
Using a grass block as inspiration, I drew out 3x3cm squares on a piece of card, to make a stencil. Then laminated it, and cut out the appropriate squares to make this...


I drew a line around their room using Mr Strawberry's spirit level.
I painted the top half a beautiful sky blue, touched up the brown where it needed it, then painted a green stripe across the middle.
Using my stencil, I added the grass block effect, then painted Minecraft clouds along the top edges. I did them free hand so they're not perfect and would've been better if I'd used my set square, but I'm happy regardless. Remembering which pot had the darker grey proved to be the biggest issue while doing this.
Sky inspiration.
And here's the finished room...


Grass block detail. 
'Snow block' storage from Dunhelm.
I'll tell you all about the curtains in a post coming soon....

Saturday, January 3, 2015

How To Up-Cycle Your Kids Favourite T-Shirts

My boys have feisty opinions about what they wear and when they're not butt naked, they're wearing their favourite trousers and t-shirts. So, over the last few years, when they've grown out of their absolute favourites, I have been up-cycling the pictures on them onto new, plain tees. Sure, I could go out and get him a new Batman tee, but this way is much cheaper and they're made just for them. Sometimes, family members buy them designer clothes and worse than watching them chuck chocolate ice cream down a beautifully made tee is watching them grow a little tight around the edges, which is how this all started in the first place. I could never face getting rid of them and the boys loved them so much. Our favourite designer tees were all applique anyway so I was inspired to re-applique them onto new, bigger tees.

So, obviously, to get started you need a grown out of tee, an iron, some bondaweb and a sewing machine or a needle & thread. 

You can go as crazy as you like with this too, there are no limits, except your imagination.
I once cut out all the images on a pair of Buzz Lightyear trousers and lovingly hand-stitched them onto a Summer hat.

Here we go; 
1. Lay out your tee.
 
2. Cut out the image you want to keep. Chuck the rest. You want to cut it out quite roughly, there's no need to be pedantic. You'll need plenty of around the edges. 
3. Lay out your image(s) on the bondaweb. Trim it as close as you can, you do not want that stuff sticking to your ironing board or your iron. You can use some of your rough edges to ensure a close trim. 
4. Flatten everything nicely and iron until the bondaweb has stuck. Most kids t-shirt images can't be ironed on, so just do it from the back, but don't forget to check it's flat on the other side, jersey (t-shirt fabric) can have a mind of it's own.
5. Now trim the edges nicely. You can be as pedantic as you like, or you can make your sewing much easier by just doing a very basic shape or by rounding everything off. I tend to leave a small edge around the image so I don't have to sew on the actual image.
6. Lay out the new t-shirt and place the image where you want it.
Because you often can't iron directly on t-shirt images, I use a piece of A4 paper because I find it gives me more control than using a tea towel or something and the heat transfers well. You could also use baking parchment or greaseproof paper.
7. You're ready to sew.
I made a few since I'd bought a triple pack of long-sleeve tees for about £7 from Asda.
You can hand stitch it (bearing in mind a CHILD will be wearing it and we all know what they do with their clothes) or use a sewing machine.
I use a free motion embroidery foot because I want to practise with it more, so no, my stitching isn't perfect but the boys won't be complaining and it's not about perfect stitching. This is a free-for-all, go for it!


If you manage to follow my dodgy instructions, I'd love to see what you make, please show off your handiwork in the comments below.

Good luck and a Happy New Year to you all xxx

Wednesday, December 24, 2014

The adventures of Timmy Twinkles 2014

1st. Timmy reintroduced himself with two advent calendars and a note. 

2nd. Timmy was found playing jingle bells on the ukulele. 

3rd. Timmy had hung pants on the boys little tree. 
Maybe they should hang some proper decorations?

4th. Timmy was found playing with the train set. 

5th. Timmy had drawn on the family photos. 
Rather than the 'clean up' panick (worried Timmy was getting them into trouble) Ed had last year, he decided to join in and drew a fart on a photo of himself haha. 

6th. Amid our Christmas jumpers, Timmy was found wearing his very own! Maybe he wanted to join us in our festive activities that day?

7th. After a day of fun on the Santa steam train, where Ed made sure he met the big guy, Timmy was found sharing a festive story with Sally Snowball (the elf who is staying with Nanny). 

8th. Timmy was found playing a game of pairs with cheep cheep. 

9th. Timmy was missing...
It turned out in my angst to not have that 'Oh god where's Timmy' panic at 11pm, I'd put him some where safe...too safe maybe...

10th. That naughty elf taped up a doorway. 

11th. We had finally got the tree inside and were waiting for the branches to drop (after being wrapped in netting) but naughty Timmy spent the night toilet papering it. Grrr. 

12th. Timmy was enjoying milk & biscuits with some festive friends. 

13th. Timmy had a painting project for the boys. 

14th. Timmy was having a movie night with some snowflake snacks. 

15th. Timmy was in the middle of completing a festive jigsaw. 

16th. Timmy was playing cars with rudolf. 

17th. Timmy left the boys a new advent calendar after they both accidentally ate all of their chocolate calendars, with a note requesting that they don't eat them all at once again. 
It didn't work. Before I knew it we were up to the 20th...

18th. Timmy trashed their story books. Every single one out of the shelf! How on earth did he do that while they lay asleep mere feet away??!

19th. Timmy had wrapped the toilet. How...erm...festive. 

20th. Timmy had been making paper snowflakes. 

21st. Timmy had been having tea & cake with some strange new friends, Betty Biscuit & Pete Polar Bear. 

22nd. Group selfie at the top of the Christmas tree. 

23rd. Betty, Timmy & Pete were found camping & toasting marshmallows, all in matching Christmas jumpers. 

24th. Timmy's last night. 
Sat on top of a pile of Christmas Eve presents (the usual; new pjs, a Christmas story - this year it's the Dinosaur that pooped Christmas- and a movie - Mr Poppers Penguins). He was also surrounded by craft projects for the boys and an entire festive village. 

There were actual squeals of delight this morning.
However much I struggled this year, with working late every week night and all, I'm going to really miss this nonsense. 
Ah well, he'll be back next year....

Timmy can be found on Instagram, search #elftimmytwinkles.