Monday, May 9, 2016

Monday Make: Zander's Name Plaque

Monday Make: This week's project

 
I have always wanted to create a nursery but never had an real need for one since the older boys shared our room for the first year of their lives and then they got a little boy's room rather than a baby nursery. But when I was about 36 weeks pregnant with baby number 3, I suddenly decided all this baby stuff wasn't going to fit in our room and I needed a nursery.
Being only 6 weeks old, he doesn't sleep in there yet, but it gives me the space to be more organized.
Today, it is one step closer to being completely finished with the addition of something that absolutely had to be made (I couldn't make it until he was born because we were keeping his name a secret).
And boy, did I have fun.
 
 
 I found an old piece of wood in the garden, gave it a quick layer of watered-down white paint.
Printed off the letters and taped the paper to the wood.
 
 
Hammered in a gazillion wood pins and tore the paper off.
(Just so you know, tweezers are fabulous for picking out those tiny bits of paper that get caught under the pins).
 
 
Then, I spent an age wrapping, unwrapping, re-wrapping wool, until I was happy with my technique.
It was fiddly, but totally worth it.
 
Then I made some cute, fluffy, little clouds and hung them, along with some shiny, silver stars from the wood (they're stapled in at the back).
I love it so much. I hope Zander does too.


Saturday, May 7, 2016

Sticky Saturday: Scratch Art Monsters

Sticky Saturday: messy play fun with kids


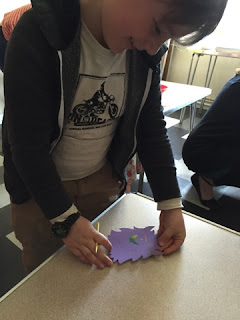
Ed and his monster.
This week's messy play wasn't very messy, mostly due to the fact that I had three children to look after thanks to an inset day at the boys school, but it was still a lot of fun.

Baker Ross, an amazing website with tons of craft project stuff, sell these delightful scratch art monster fridge magnets. The sets come with everything you need and the kids never seem to tire of scratch art and the simple way it works. Even my older boys (messy play at our tots group is aimed at 0-4 years old) at the ripe old ages of eight and (almost) seven still love it.

Bean and his monster


Even the mums can't help themselves.

Wednesday, May 4, 2016

Wreck it Wednesday: Poke Holes in This Page

Wreck it Wednesday: a page from one of my journals.

I mostly hate this page and wish I'd done something different with it, but I guess that's part of the process. I have learnt that the 'wreck this journal' communitee are strong believers in not re-doing pages, no matter how much you hate them, because it's not about creating perfect works of art on every page.
 
About 'Wreck This Journal' by Keri Smith
(Description from Amazon)
It is book for those who've always wanted to draw outside the lines but were afraid to do it. For anyone who's ever wished to, but had trouble starting, keeping, or finishing a journal or sketchbook comes Wreck This Journal, an illustrated book featuring a subversive collection of suggestions, asking readers to muster up their best mistake - and mess-making abilities to fill the pages of the book (and destroy them).
Through a series of creatively and quirkily illustrated prompts, acclaimed artist Keri Smith encourages journalers to engage in "destructive" acts - poking holes through pages, adding photos and defacing them, painting with coffee, colouring outside the lines, and more - in order to experience the true creative process. With Keri Smith's unique sensibility, readers are introduced to a new way of art and journal making, discovering novel ways to escape the fear of the blank page and fully engage in the creative process.

Tuesday, May 3, 2016

Tempting Tuesday: Fruishi

Tempting Tuesday: trying not to kill my family with my experimental cooking.

I've been dying to have a go at making some fruit sushi.
I've been making wonky sushi for years and as with most foods, I was always left thinking; "yes, this is great, but how can I make it into pudding?"
Mmmmm pudding. 
So, here we go. Rather pleased with them myself, despite them being a bit of a nightmare to make. 


First things first. You want to get the rice right.
Don't, under any circumstances, half cook the rice, leave it in a pan with a lid on and then do the school run. You'll end up with rice that has turned to smush and yet unbelievably is raw on the inside of each tiny grain. Trust me when I say, this is un-fixable. 
Banana chunks with the middle removed, filled with sushi rice & topped with chocolate balls. It's easy to get the inside out with an apple corer, but its a nightmare to fill the things with rice without the whole thing splitting.
Thinly sliced strawberries, laid out on cling film, with a dollop of rice in the middle. Form into a ball & chill before unwrapping. 
These little balls are actually really easy to make, so long as you cut your slices thin enough. Once you've got the knack of balling it all up into the clingfilm, you're on a roll.
Thinly sliced kiwi, laid out on cling film, with a dollop of rice in the middle. Form into a ball & chill before unwrapping. 
Slices of kiwis and strawberry in the centre, wrapped in rice using cling film and a sushi rolling mat, then dipped in poppy seeds. 
A bit tricky to roll, even trickier to slice. I find chilling the whole roll in the fridge for a bit before attempting to slice it up makes it much less likely to disintegrate.

The recipe inspiration I used, I found here and here.
Of course, I never followed the recipe because, well, I can't. Though that's probably why I struggled so much getting my rice right.
The possibilities are endless!
And it's all so very, very yummy.
I'll definitely be making more in the very near future.
What fruits would you use? Share your Fruishi ideas, I'll give it a bash.


Monday, May 2, 2016

Monday Make: 'The Dark' Diorama

Monday Make: This week's project
 
So, this is my first attempt at a diorama and I'm pretty pleased with it.
I decided to do it based on Lemony Snicket's 'The Dark', which is a lovely little book with really striking illustrations about a little boy who was afraid of the dark.
 
 
I started with the bottom of a posh chocolates box I couldn't face throwing away but had no real use for and painted the inside black.
 
 
I painted a piece of paper, left it to dry on the bathroom radiator (while panicking about the consequences of boys and their bathroom breaks) then drew the stairs. Painstaking doesn't quite cut it, it took me forever to be happy with the perspective and even then I screwed it up.
Now to make the little drawers. I cut out the sides out of cardboard, taped it all up with masking tape and painted it.


 The little set of drawers is slightly too big for my liking but considering this was made on a rainy Bank holiday Monday while trapped in the house with a bored husband, two kids and a newborn, it's really not bad. In between attending to everyone's needs I have been painting and paper cutting and I'm finally finished.

 
I hope this inspires you to make something, anything, just be creative and enjoy it.


Saturday, April 30, 2016

Sticky Saturday: April Showers

Sticky Saturday: messy play fun with kids
 
Every Thursday, I run the messy play at a local mums'n'tots group so I thought I'd include some of the fun we have there and share crafty ideas (which were all stolen from Pinterest obviously). 

This week we made April Showers pictures, a lovely and simple craft which just involved cotton balls, raindrops cut out of paper and lots of pva glue.
I always make one to show the parents what we're doing but I always prefer the kids versions myself. 


Thursday, April 28, 2016

Throwback Thursday: Back in 1999

So the other day this popped up in my Facebook news feed, and while this isn't your usual 'Throwback Thursday' post, I really fancied a good old reminisce.

Before I was 'Mom' I was kinda cool. Now I mostly live in badly fitting jeans and old t-shirts I don't bother to replace when they get all saggy, because lets face it, once I'm in the clothing aisle of the supermarket, I'm hunting out cool clothes for the kids or replacing the underwear they've grown out of. I wish I had more time and money to spend on myself, but for now, while the kids are young, I don't and that's life.
Anyhoo, enough of the martyrhood. I thought I'd put together the uniform of my youth for your viewing pleasure. I tried so hard to find an image of the Bloodhound Gang hoodie that I wore for years, but it does not exist, and of course, there are no photos of me because...well...we didn't do that much then did we?

The uniform of my 1999 (all the way up to about 2003).

I still love these clothes. 
The keychain would have to have either your keys or your wallet on the end, tucked into your back pocket. Wannabes who simply clipped it to their beltloops were mocked.
The shoes had to be an acceptable level of battered. New shoes made you look like either a scally (now called a chav) or a wannabe (someone who recently got their Mummy to buy them a whole new wardrobe so they could fit in)
The fact that I still own my keychain and my battered old Buffaloes probably says a lot (pictured above). I attempt to wear the Buffoloes during winter, along with a pair of Vans I still have but having children gave me the hottest feet in the world and aside from twisted socks, there is nothing more annoying than hot feet, so I tend to stick to pumps. I don't need my keychain any more, which used to keep my purse safe in my back pocket but since I now cart round a massive handbag full of cereal bars and receipts, it goes in there. Mr Strawberry however still uses his.

I shall leave you with one of the few photos of me I could find without an ex-boyfriend. Just for fun.
Now please excuse me while I re-evaluate my boring wardrobe....


Wednesday, April 27, 2016

Wreck it Wednesday: Scribbling on the Edges


Wreck it Wednesday: a page from one of my journals.
 
This is the first of my 'wreck it wednesday' posts, so I thought I'd start with the first journal I started almost a year ago. I haven't finished it yet, but I'm sure I will over the course of this series. It's not the only journal I currently own, I also have the Anti-journal amongst others, and I even made one for my boys.

I love these books, they kept me sane during a really rough time I had last year. There is such freedom in the way they force you to 'ruin' a perfectly good book, something any book lover would struggle with. And I love completely nerding out and watching YouTube videos of other people's completed books, its fascinating how differently people interpret suggestions.
Anyway, here goes...


Wreck this Journal is available here.

About 'Wreck This Journal' by Keri Smith
(Description from Amazon)
It is book for those who've always wanted to draw outside the lines but were afraid to do it. For anyone who's ever wished to, but had trouble starting, keeping, or finishing a journal or sketchbook comes Wreck This Journal, an illustrated book featuring a subversive collection of suggestions, asking readers to muster up their best mistake - and mess-making abilities to fill the pages of the book (and destroy them).
Through a series of creatively and quirkily illustrated prompts, acclaimed artist Keri Smith encourages journalers to engage in "destructive" acts - poking holes through pages, adding photos and defacing them, painting with coffee, colouring outside the lines, and more - in order to experience the true creative process. With Keri Smith's unique sensibility, readers are introduced to a new way of art and journal making, discovering novel ways to escape the fear of the blank page and fully engage in the creative process.

Tuesday, April 26, 2016

Tempting Tuesday: 'A Gallant Effort' (a Bad Cake)


Tempting Tuesday: trying not to kill my family with my experimental cooking.
My new 'Tempting Tuesday' series is supposed to be for my cooking/baking experiments. However, this week's endeavour went a little sour, so I thought I'd include it regardless, mostly for comedy value but also as a 'how NOT to'.
 It's so not in my nature to give up but maybe I should give up baking, at least until I can be better prepared. I should have given up on this cake before it went in the oven. Before I wasted two bars of chocolate on it.

My baby sister turns 21 this week and she asked me to make her a chocolate cake for her tea party. Despite having a new baby, I decided to say I would. I should have said no, but it's my baby sister, how could I?

Even the ingredient are messed up, because as I was making it I forgot to exchange some of the flour with cocoa powder to make it chocolatey. Thankfully, I have a side note in my recipe book which splits the ingredients by a third, so I just added another third, making it a rather large cake. 
Large cakes aren't a large problem with my family. 
Unless it tastes like shit of course.

So, the ingredients were as follows; 
13oz plain flour
3oz cocoa
8oz sugar
6tsp baking powder
8oz butter
4 eggs
140ml milk

Filling; whipped double cream with 200g melted chocolate folded in.
Topping; (and this is where it goes completely awry)
150g butter
150g sugar (SHOULD HAVE BEEN ICING SUGAR but I had a brain malfunction)
200g melted chocolate

I got all my ingredients together at 5pm.
Zander, the four week old baby decided he didn't ever want to be put down, so my ingredients were sieved and weighed in sporadic intervals. Then I realised I had to cook the bigger boys dinner by 6pm and get them to bed by 7pm - alone as Mr Strawberry was working late. 
By 8:30pm, after three attempts at frying it due to the un-put-down-able baby, I had managed to have a bacon sandwich for dinner.
I finally found some cake tins of similar size and got this fucking cake in the oven by 9:30pm, when Mr Strawberry finally got home. At 10pm, it was finally yielding a clean knife when I poked it, so I threw a fresh tea-towel over both the tins and went to bed.
The next morning I set out to decorate it. Not putting it in a sealed box overnight of course meant it was a little dry. I should have known how bad it was going to be because when I was adding the whipped cream and chocolate in between the layers, it was all a bit too easy, with none of the tentative 'oh god the cake is going to split' as I lifted each cake layer.
I had already whisked the sugar into the butter before I realised the consequences of using the wrong sugar. Durrrrrrr. Gritty much. By then, it was too late, like running down a hill, there was no way of stopping now. So I threw the melted chocolate in regardless and chucked it on the cake. As I lovingly (begrudgingly) smoothed the 'butter icing' over the cake, my darling Mr Strawberry wondered in and kindly told me (knowing the issues I was having) it was a 'gallant effort'. I was going to make a nice cereal box cardboard stencil to use while sprinkling on the gold glitter sugar but by then there seemed no point trying to improve this monstrosity so I carefully sprinkled it on by hand, making a delightful '21'. 
Of course everyone at the tea party was very polite, those who weren't chocca full of party food and braved a slice, said it was lovely, but I tried some myself and I can honestly say, it wasn't worth the calorie intake. I was tempted to dollop on some cream to add some sense of moisture, but I never bothered. 
This cake and me, we're not friends, despite how much chocolate it contains.  

So, here's my how NOT to bake guide;
1. Don't bother to make sure you have everything you need before starting. 
2. By all means, attempt to bake while looking after 3 children, including a newborn, without another adult to help.
3. Always attempt to make a very special cake during dinner time or bedtime, or both for maximum effect.
4. Always bake past your bedtime. 
5. It's okay to substitute icing sugar for normal sugar, not gritty at all. 
6. Forget when you put the cake in the oven. 
7. Leave cake out overnight to dry. 
8. Decorate with glitter sugar sprinkles, those things will go a long way in disguising how gritty your butter icing is. 

Gritty butter icing.


Mmmm, so dry and crumbly.

Sorry Baby Belle :(

*****************UPDATE**************

 I just had to share the lovely thing my Mum posted on Facebook. 
"Actually, lots of us went back for seconds. The butter icing is a little, er, unusual but the cake is yummy & not dry at all. What really mattered to the birthday girl is that her big sister made her a cake, despite having a new baby. Loving people is what really matters & that's what you've done."
And she's right you know. It doesn't matter if we cock up, it's all about the trying and the loving people.


Monday, April 25, 2016

Monday Makes: My growing bump

Monday Make: This week's project

This is the first of a series I intend to do, and although it's not strictly a 'make' in the crafty sense, it still took around nine months worth of work (obviously) and is something I always wished I'd done during my other pregnancies.


I don't know if this is obvious, but every four weeks I took a naked selfie in my bedroom mirror, turned them each into a silhouette in photoshop and then brought them all together. 

New Human Alert...Zander is here!

I have been too quiet here, I miss it terribly, but I have been very busy making a human.
Zander was born on the 26th March, on a Saturday night, weighing a mahoosive 10lb 4oz (I was a little shocked to say the least when I plucked him from my ladygarden).
I have grand intentions for lots of regular blog posting, which may or may not be fruitful, depending on how forgiving my beautiful little Zander is. We shall see won't we?

My little hunky chunk

Ed with his new baby bro